Range Rover TBI EFI conversion
Project Updated 18.09.2003
Background
I have
Old Faithful Off Road warrior. It is all over modified 1985 Range Rover 3.5 V8. Since I have had the car I have dreamed about efi. About four years back I stepped over the point of no return. I bought a spare part car what was equipped with Edelbrock intake manifold. Propre manifold was the trigger for me. I started to gather parts and fabricate adapters etc. I also started to gather information and learn how ECM boxes work and how they can be modified. Mainly because of intake manifold construction I decided to start with TBI setup. I also understood that TBI and 1227747 combination was most strait forward solution. Spare part car acted good lab rat for me. I basically build and tested whole conversion and then two years ago swapped or installed it to final home.
Experiences
Now I have driven two summers with my efied Range Rover. Car runs well. Main goal for the project was clean and tough running. This dream came true. Another thing what was not really important but very nice thing with rising gasoline prices is fuel consumption. With EFI my Range runs with half amount of gasoline what it used to do.
Parts and modifications
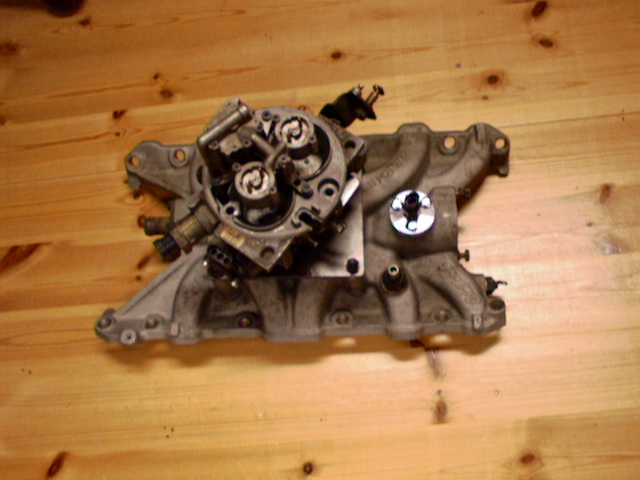
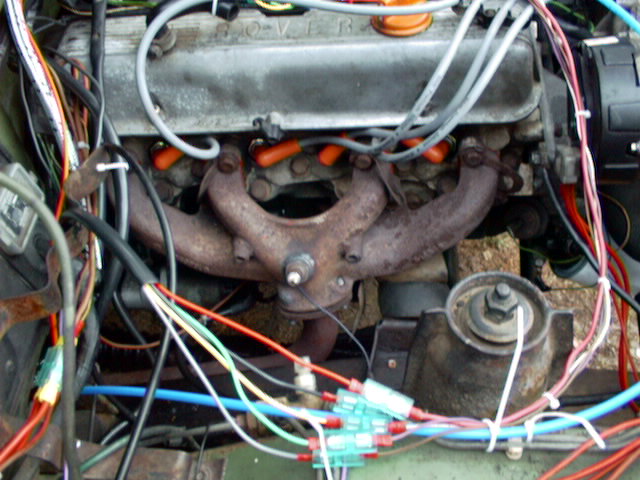
Intake manifold and
TBI adapter.I fabricated three different lengths of adapters between TBI throttle body and Edelbrock intake manifold. Original idea was to test the differences. I however first installed the
longest 50mm adapter and have been satisfied with it and newer tried the others.
Throttle body
GM 4.3 TBI throttle body is used in this project. I learned interesting thing about 4.3 throttle body. In most GM applications there are different size injectors installed. I managed to find two similar ones for my conversion. I never managed to find any flow rate information about my injectors
Fuel components
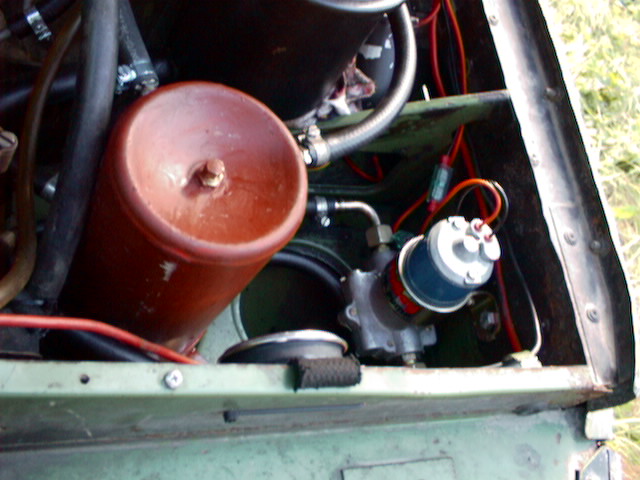
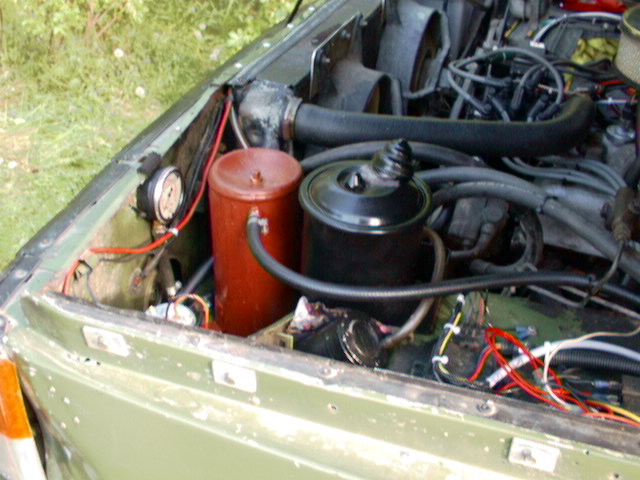
I fabricated surge tank from used fire extinguisher bottle. Tank and fuel pump is mounted on the left front corner of the car. There is also under hood fuel pressure gauge. Rover original fuel return line is too thin for efi. New return line is routed to tank through fuel fill tube. This was easy way to install it.
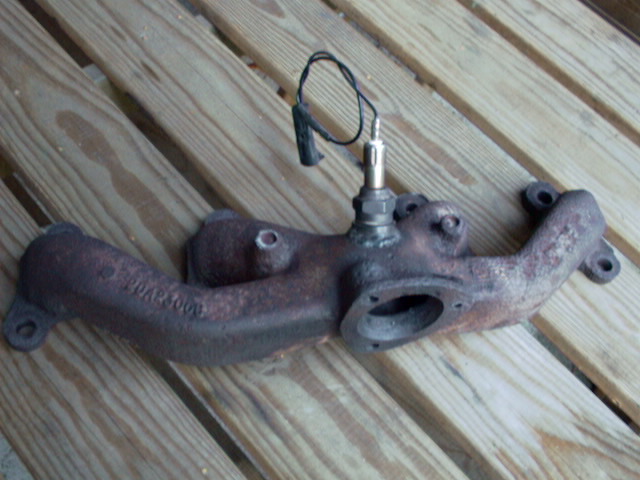
Exhaust manifold / oxygen sensor
Normal GM zirconia sensor is used in my conversion. I mounted it the right exhaust manifold. Proper threaded nut was found from hydraulic fittings.
MAP, temp and knock sensors
Again standard GM stuff was used. For temperature sensor I had to manufacture adapter what you can see in manifold pictures.
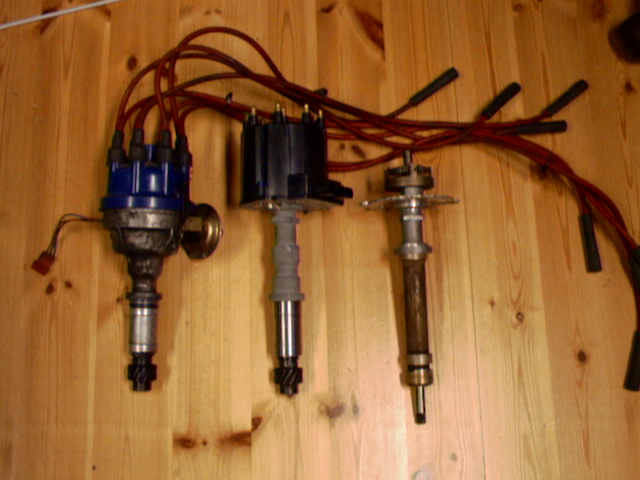
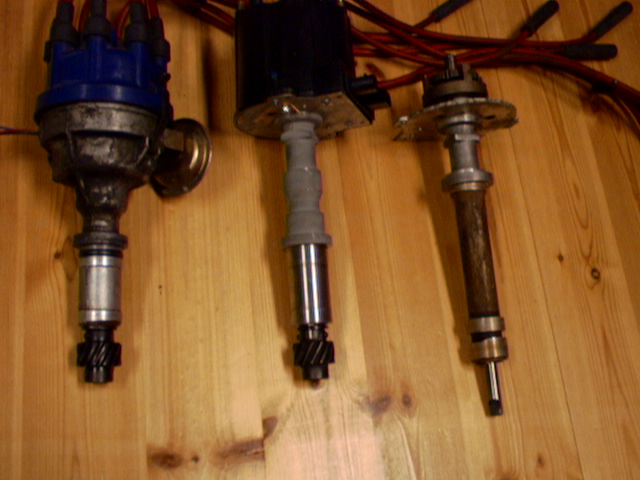
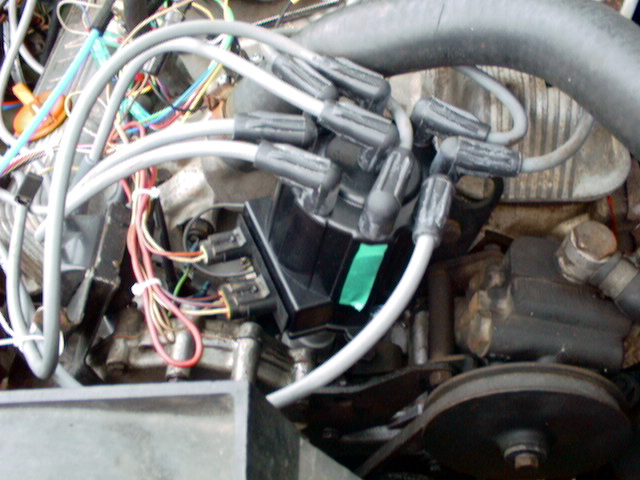
Distributor
I decided to use also GM ignition components. Problem rose with distributor fitting. This was maybe most challenging part of whole project. In this picture there are stuff from left to right. Original Rover distributor, modified GM unit and original GM distributor chassis. Original tube was cut and fitted to steel tube machined to Rover dimensions. Low-end bearing was also taken from original unit. Shaft was cut and "screw driver tip" for oil pump driving was ground on it. Also thin spacer bushing was needed to fit Rover drive dear on thinner shaft. BTW shaft is hardened steel.
VSS sensor
ECM needs also vehicle speed VSS information. I decided to build this thing
inside speedometer. Two blacks and two white sectors are painted on speedometer magnet wheel. Reflective IR light sensor and one transistor is used to detect speedometer rotation. This circuit is build on prototype board and fixed behind speedometer. No schematics were ever drawn about this sensor circuit.
ECM
1227747
is placed on the roof of the car. If the thing sinks it is not the first thing to go under water. Fuel pump relay and some other stuff is also mounted same place. Picture is not very good but if you look carefully you can also see 160baud ALDL display and led bar for o2 sensor.
Tuning
First I build
simple simulator setup and started to play with ECM. I also did simple EPROM emulator with terminal interface. You can do small changes on line and emulator receives new image (S19 records) from terminal Very easy and quick way to test things. I made first bin with simulator. Car started with it and run immediately well. After I moved setup to final body I have fine adjusted fueling with WinALDL. Jonas Bylund has done great job. With WinALDL you can get fueling adjusted with only few tens of kilometers test-driving. Last summer I did some idle parameter testing and tuning. Ignition advance is still untouched. Last summer I made small modification to 747 code to get calculated advance value instead of prom id in the ALDL data stream. Maybe next summer is for ignition tuning.Bin with ignition advance instead of prom id in aldl data stream
Links
http://www.diy-efi.org/ this is very good root link. You can find enormous amount of information there and of course more links to interesting sites.
Other